
ITS
HISTORY, PRODUCTS AND PROCESSES
7: Process
The manufacturing process began with the
unloading of lorries in Castle Street; Long Garden
Walk was inaccessible to large vehicles at that time, the now pedestrianised junction with Castle Street being the only
vehicular access. The blue half-hundredweight drums of raw polyester resin were
then taken to the workshop on a hand trolley along these narrow streets (which
were former rope-walks). The drums had to be manhandled up the rickety outside
steps to the upper floor, where moulds were assembled for the individual
products. The moulds were filled with the resin, which had been mixed with
pigments of the appropriate colour mix and a catalyst to harden the resin. One
of the later processes used in making the coffee tables (36 x 18 inches) was
the use of two different mixes of resin. The first, and usually darker, colour
(e.g. blue) would be poured into the mould, immediately followed by the second
colour (e.g. gold) poured into the centre, causing the blue to be displaced.
Pigmentation and all aspects of manufacture
were craft processes, performed mainly by eye - no computers in those days!
Addition of the catalyst caused a rapid chemical reaction, heating the resin
and, in addition to the internal crazing, created a quite unique smell which
drifted over the area, no doubt to the consternation of residents in the
upper-class homes of Castle Street! The process had to be adjusted to create
either a large shattering effect for products such as lamps, or a smaller,
closer shatter more suited to smaller products such as the paperweights or thin
castings such as the tables. Once the resin had cooled and set, the moulds
could be removed and the object passed to the sanding department downstairs.
Cube paperweights and their derivatives
were cast in glass moulds; this was also the method for table lamps, with the
glass pieces of the mould held together with Sellotape.
The egg paperweights were cast in glass bulbs manufactured primarily for the
electric lighting industry - these were than cracked open like real eggshells
to obtain the piece from within. This was also probably the way the spheres
were cast, but memories cannot confirm that for certain. The moulds used for
coffee tables usually consisted of a large wooden board covered with Sellotape and then cardboard edges to the required height
were Sellotaped to the board; a “Heath Robinson”
method, but cheap and effective. After the casting was broken out, the least
interesting side would be chosen for a glassfibre
base to be bonded. This was done using the time honoured method of sticking Sellotape around the sides of the table to form an edge to
retain the bonding resin. The top of the table was then cast using clear resin
to form a smooth surface to be polished and to seal the large exposed cracks
where the shatter broke through the surface. After squaring up the casting in
the finishing department, using an angle grinder, the same method for filling
the cracks that protruded through the sides also involved a retaining strip of Sellotape and a hot resin mix. Once the edges were filled
the whole table could then be sanded smooth and French polished.
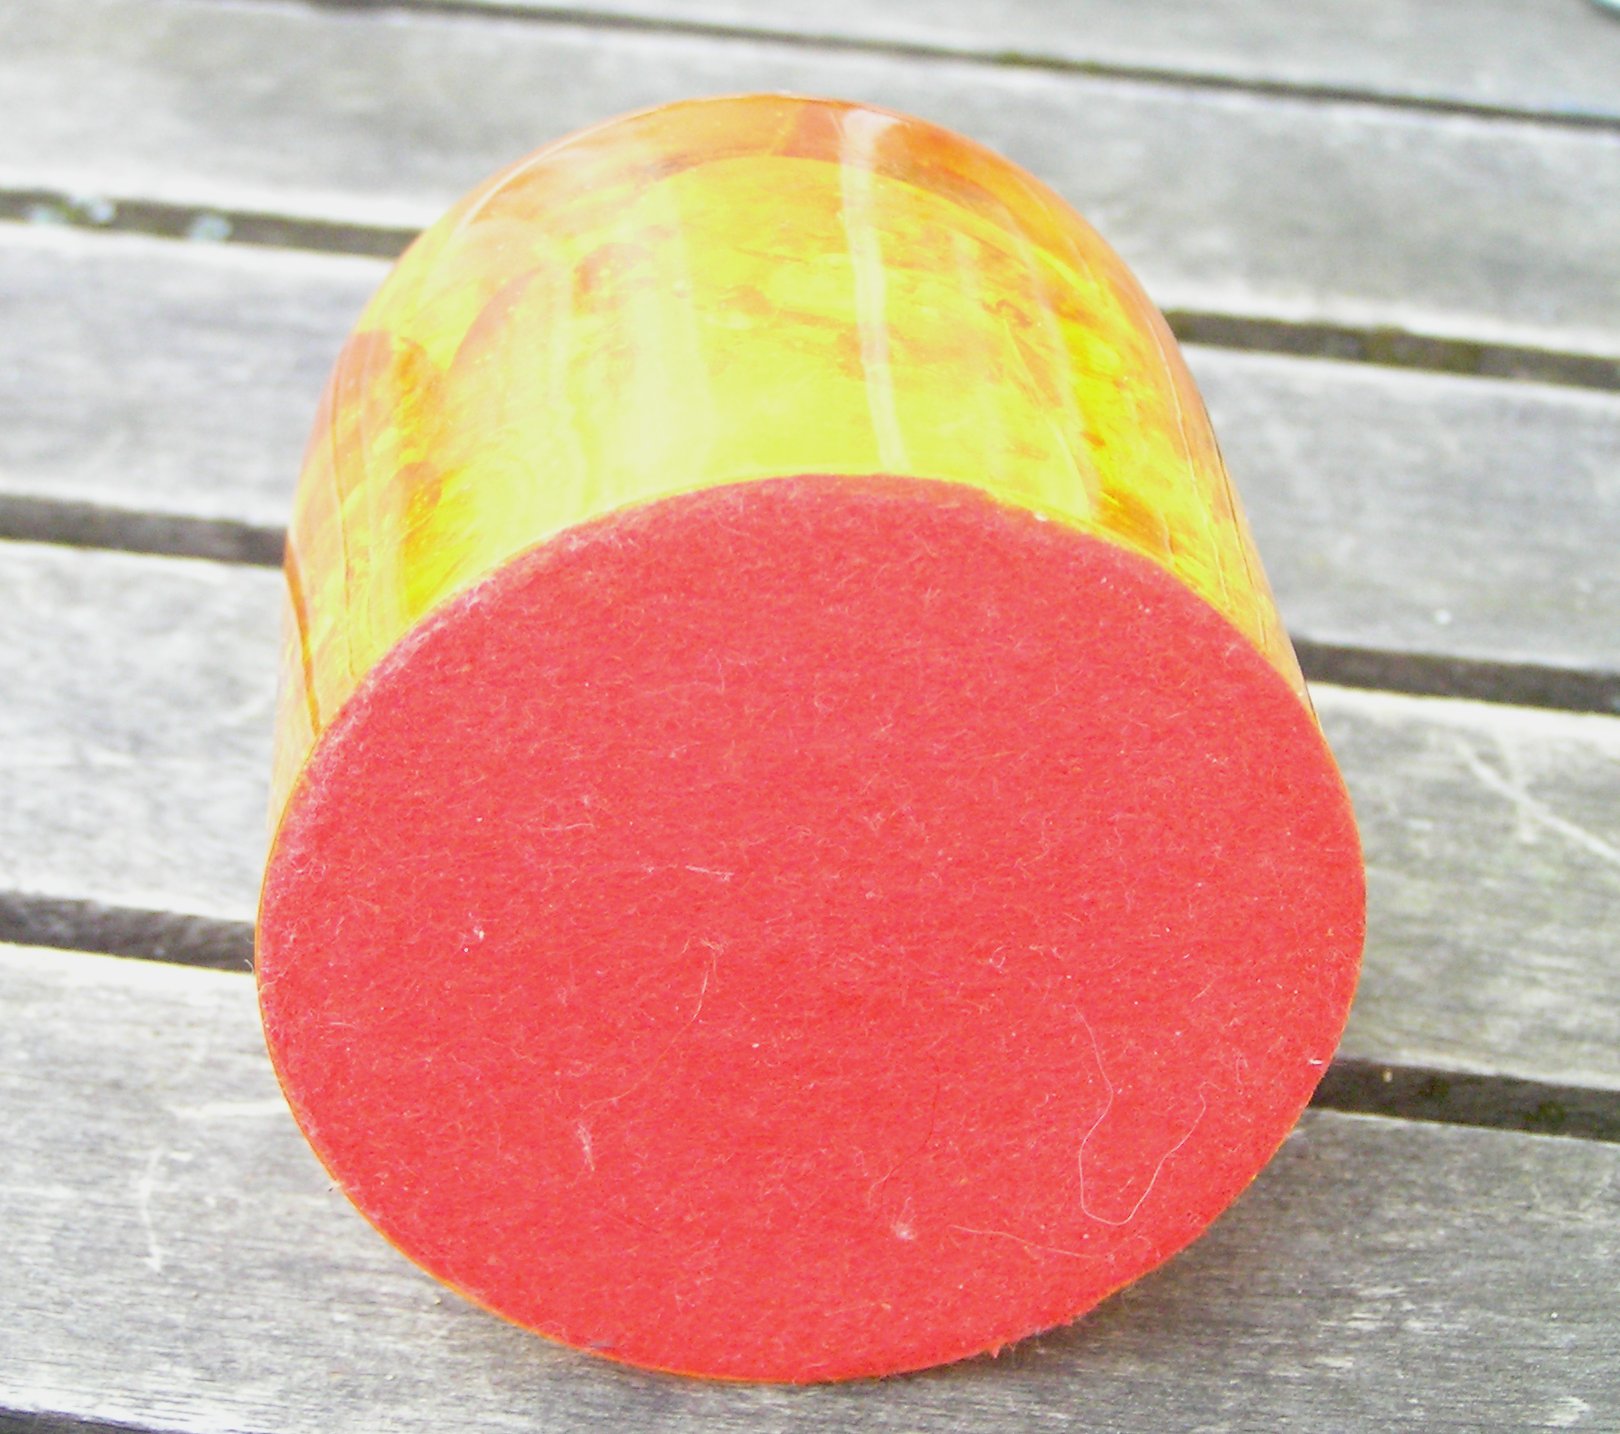
Pen-holder, showing felt base
Photo: © Mike Andrew
The base of the smaller moulded items would
have sharp flashing
around the edges and, as a result of cooling shrinkage, a slight dip in the
middle. This base would be sanded flat for later application of a felt base
(or, for certain products, the base would be fine-sanded, then
polished instead of having felt applied). In the sanding room, despite efforts
to extract and filter it, the air was always thick with resin dust. Those of us
who worked there wore an extravagant range of hats to keep the worst of it out
of our hair, and tied hankies across our mouths to protect the lungs. These
were the days before dust masks became the norm. And any benefit of tying
hankies over mouths was probably negated when we took turns to clean out (with
brooms, shovels and sacks) the "dust room" - a sealed room to which
the extractors sent the dust they collected! But at least we weren't working
with asbestos, fortunately. The surfaces which had been in contact with the
mould also needed processing - there would be blemishes which would need to be
polished out (or possibly sanded and then polished). There might also be
surface cracks - major cracks would result in rejection of the piece but minor
cracks would be filled with clear resin, sanded and polished to perfection.


superannuation Counter
![]()
Search Engine Optimization and
Free Submission